Using CCraft Studio
This guide walks through the CCraft Studio app: building a UI, programming with blocks, adding mod plugins, testing on different screen sizes, running your project live in CraftOS‑PC, and sharing it through the cloud.
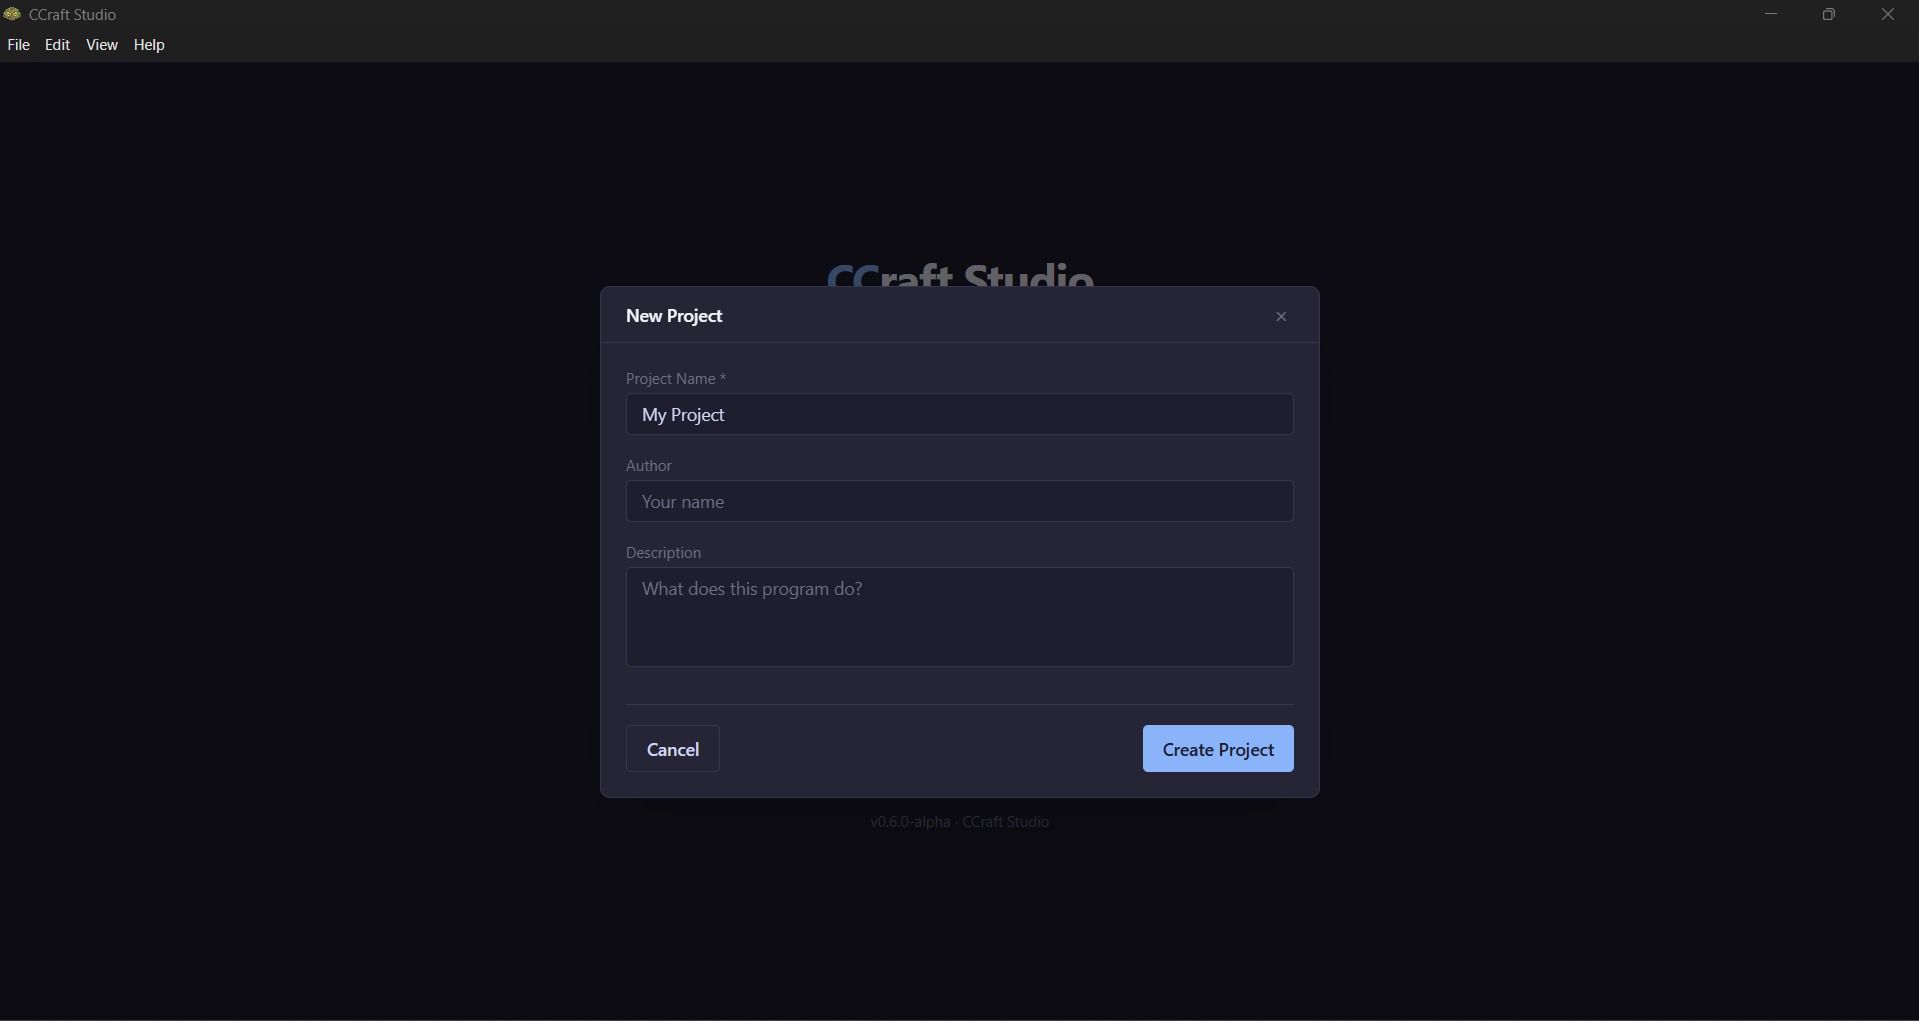
Creating a project
From the welcome screen, choose New Project, give it a name, an optional author and description, and create it. You can change these later in Settings → Project Settings.
The editor opens with two modes you switch between in the toolbar:
- UI Editor — design what's on screen.
- Blocks — program how it behaves.
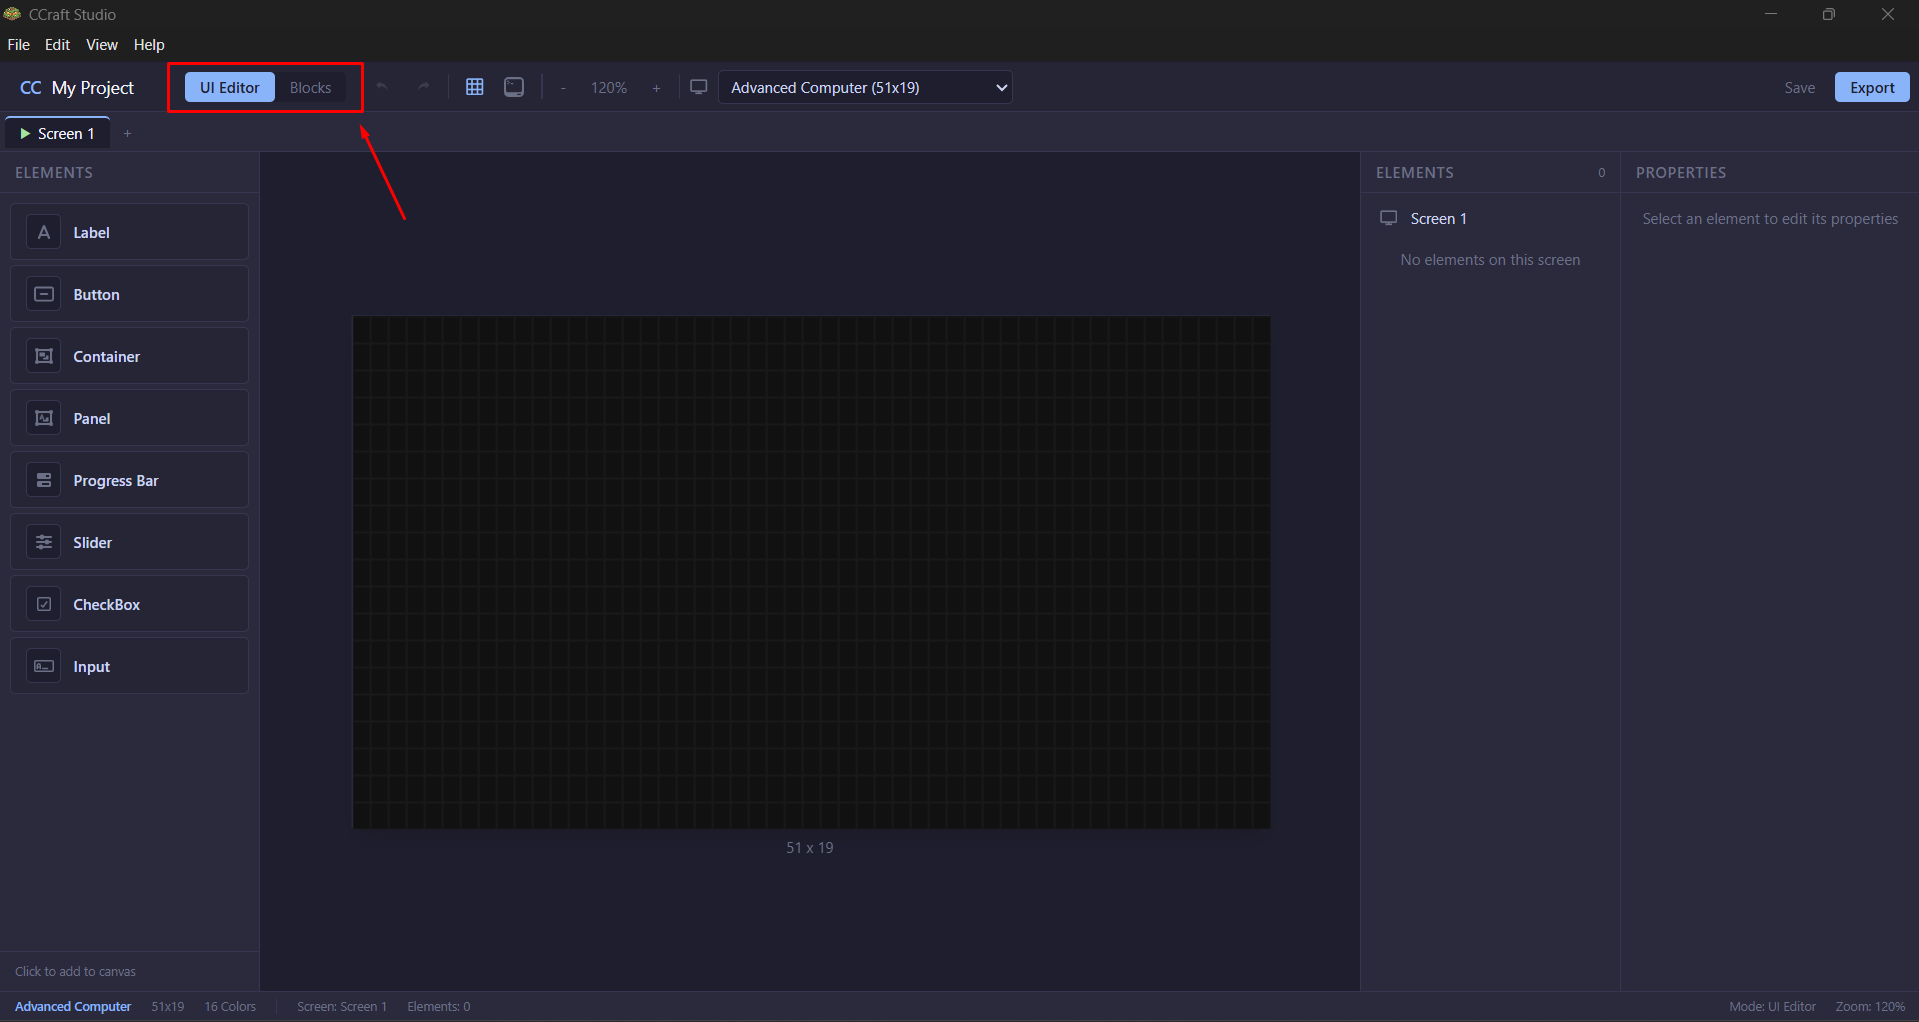
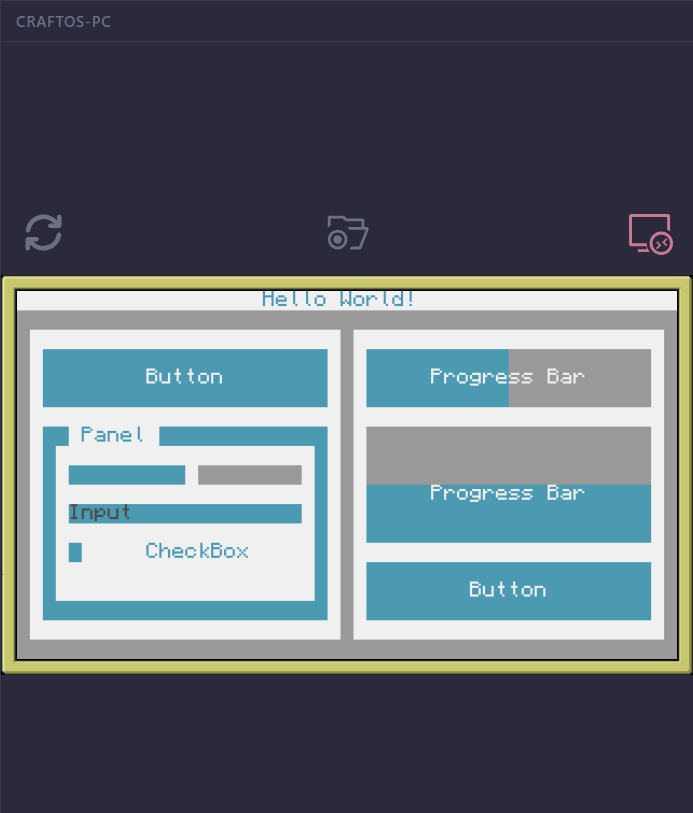
Designing the UI
In UI Editor mode, drag components from the elements panel onto the canvas. The available components are:
| Component | Use it for |
|---|---|
| Label | Display static text |
| Button | Clickable button |
| Container | Group elements with flex/grid layout |
| Panel | A titled Container with border |
| ProgressBar | Show progress |
| Slider | Controll value |
| CheckBox | Toggle option |
| Input | Text field |
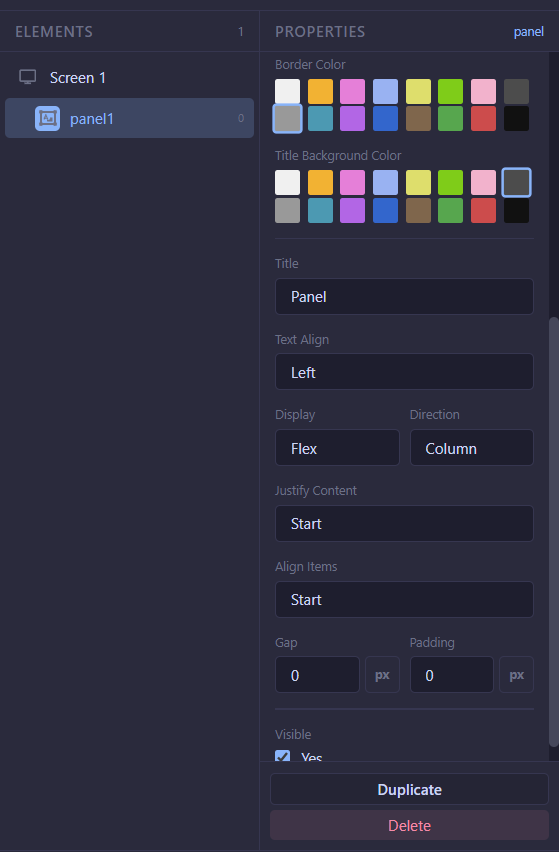
Editing properties
Select an element to show its Properties panel. From there you set its text,
colors, size, alignment, layout, and more. Sizes can be fixed (px), a percentage
(%) of the parent, or fill to take the remaining space, and Containers/Panels
arrange their children automatically with flex or grid rules.
See UI Components for every property each element supports.
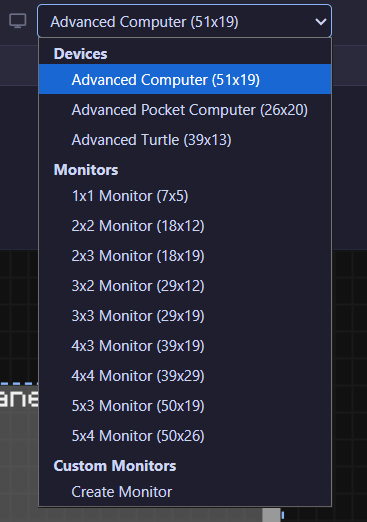
Screen sizes for testing and responsive design
A CC: Tweaked program looks different on a pocket computer than on a 5×4 wall of monitors. Use the screen‑size selector in the toolbar to preview your layout at different display dimensions:
- Devices — Advanced Computer (51×19), Advanced Pocket Computer (26×20), Advanced Turtle (39×13).
- Monitors — every monitor block size, with its real character dimensions.
- Custom Monitors — choose Create Monitor to define your own block size; it's saved with the project.
Because layouts can use %/fill units, switching sizes shows how your responsive
design adapts.
Programming with blocks
Switch to Blocks mode to add behavior — no Lua required. Each screen has its own block workspace. Drag blocks from the categories on the left and snap them together.
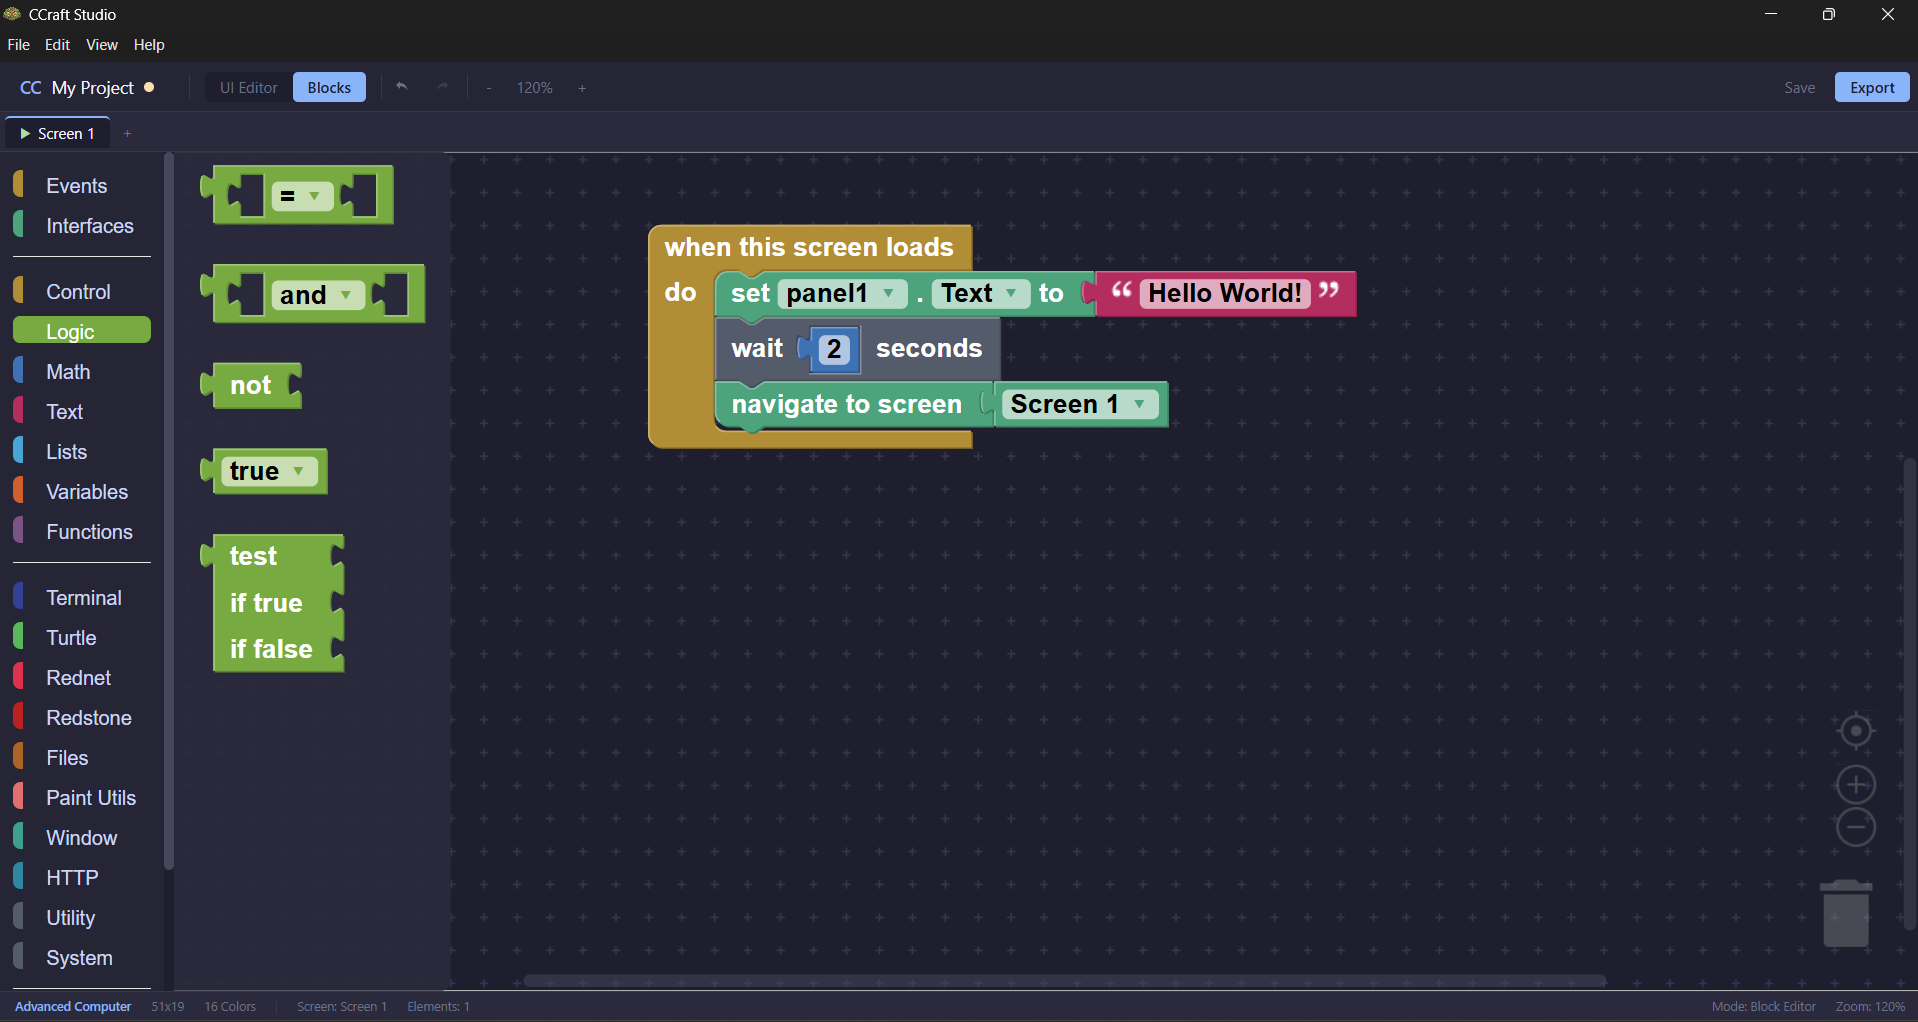
Most logic starts with an Event block with your actions nested inside. Interface blocks let you read and change element properties and move between screens.
See Blocks for all the block categories.
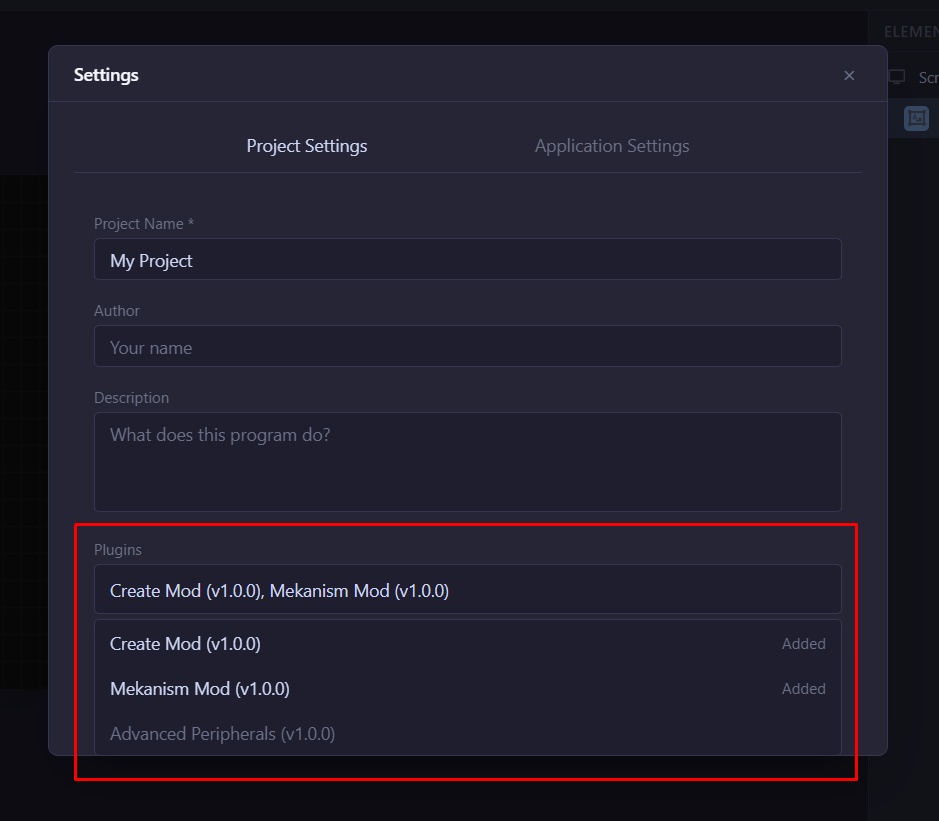
Plugins (mod support)
If your world uses mods, enable their blocks in Settings → Project Settings → Plugins. Supported plugins:
- Create Mod
- Mekanism
- Advanced Peripherals
Each enabled plugin adds a category of blocks for that mod's peripherals (reactors, motors, detectors, and so on), which export just like any other block.
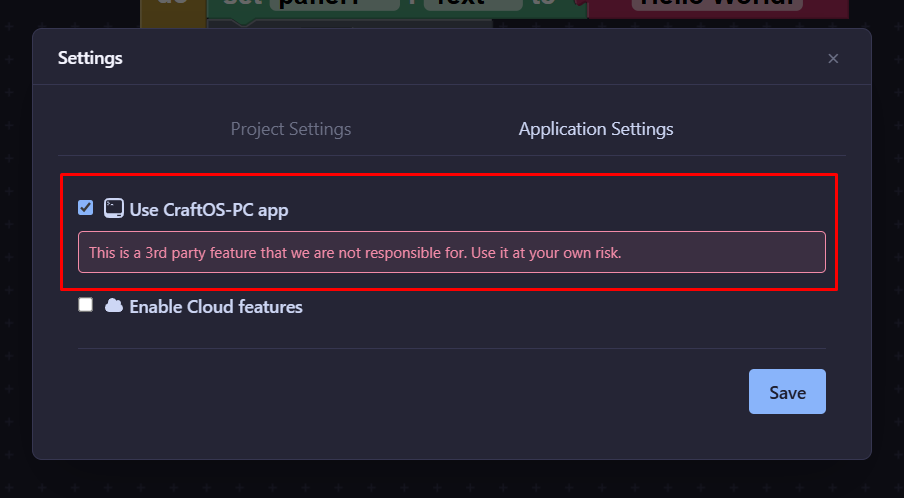
Testing in CraftOS‑PC
CCraft Studio can run your project live in a built‑in CraftOS‑PC preview so you can click and type against the real runtime without leaving the app.
Activate it
- Open Settings → Application Settings.
- Enable Use CraftOS‑PC app option.
Note: The CraftOS-PC application must be installed on your system with
Console Optionenabled when installing! - Save. A CraftOS‑PC toggle now appears in the toolbar that opens the live preview panel.
Use it
In the preview panel you have options that can:
- Reload — export the current project and run it in the session.
- Open folder — open the session's project folder on disk.
- Remote — switch to a remote session and get a
wget run …command you can run on a real in‑game computer.
If you see “CraftOS‑PC not detected,” CCraft Studio couldn't find a CraftOS‑PC installation to launch.
Cloud upload
Cloud features let you upload a temporary build of your project and get a one‑line command to run it in‑game.
Activate it
- Open Settings → Application Settings.
- Enable Cloud Features option.
- Paste your token into the field.
Get your token by logging into ccraft.studio and copying it from your dashboard.
- Save.
Upload a project
With cloud enabled, an Upload Temp button appears in the toolbar. Click it to package your project and upload it. When it finishes you get a command like:
wget run https://…
Run that command on a computer in CC: Tweaked to download and launch your program — handy for quickly testing a build in your actual world or sharing it with friends.
Exporting
When you're happy with the project, use Export button from the toolbar to write the Lua files to a folder.
This is covered in Exported Project Templates.